 About the Demo Calendar
This demo calendar demonstrates how Teamup addresses the needs to share availability of a group of trainers (or teachers, therapists, installers, musicians …) and allow their clients to make booking directly on their calendars.
 The Challenge
ACME is a training company with multiple trainers and a growing number of clients. The manager has been coordinating the booking process between the trainers and clients, mostly by email and calls. This involves receiving booking requests from clients, checking availability of the trainers, suggesting and informing relative parties about tentative booking and alternatives, booking cancellation, and confirmation. As the business grows, the process has become an administrative pain and an ever more significant resource drain, not to mention the emotional frustration and inconvenience rising out of conflicts and errors. The manager wants to replace it with an automated calendar solution.

 The Teamup Solution
A Teamup Calendar can help reduce or eliminate the amount of time the manager spends coordinating the trainers and the clients, so that she can focus on her real job as the manager.
1. Create a Teamup Calendar
Do so if you don’t have a Teamup Calendar yet. Once a calendar is created, click the administrator link and you’re ready to go as the administrator.
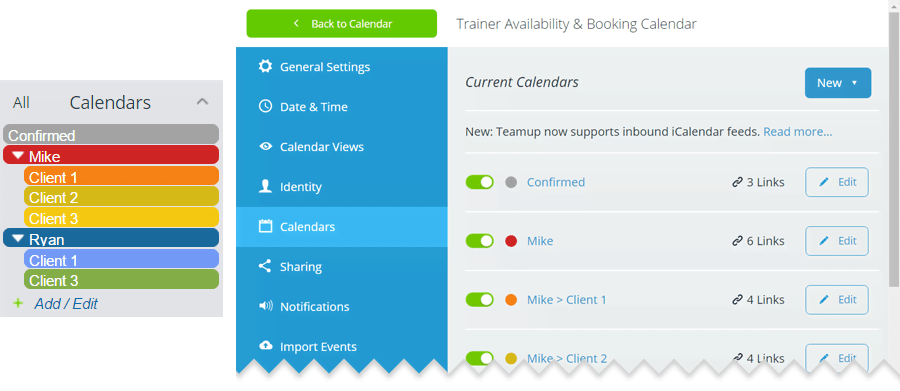
2. Administrator: Setting up the sub-calendars
- Add one sub-calendar for each trainer where the trainer can block the days/hours that he or she will not be available. Set all trainer calendars to disallow overlapping events to prevent double booking.
- Add one sub-calendar for each client that the trainer works with and nest it under the trainer’s calendar. This calendar serves like a private information panel for the trainer and the client. When changes occur on this calendar, both parties will receive email notifications. This is to allow a client to only receives notifications relevant to his bookings, but not all bookings on his trainer’s calendar. For this to work, it’s important that bookings are assigned to both this calendar and the trainer’s availability calendar (see more in 6 below).
Optionally, add one sub-calendar “Confirmed booking” for the trainers to lock bookings if needed.
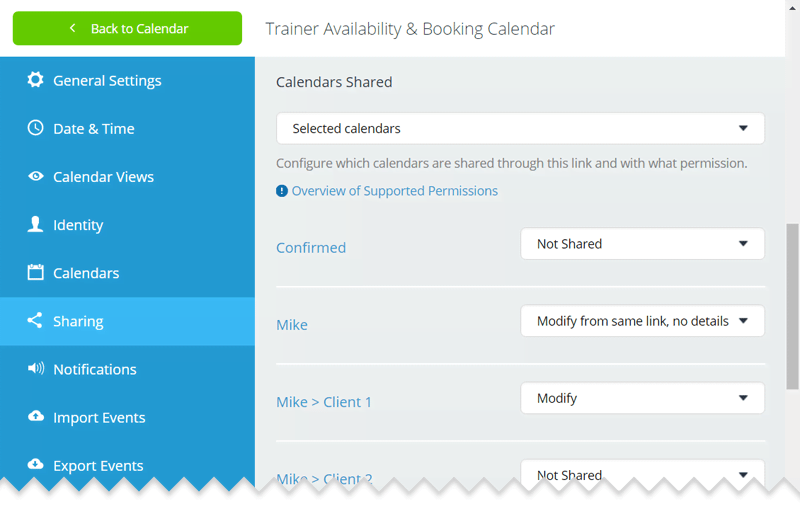
3. Administrator: Configure access links for users
Go to Settings > Sharing where you can add a new link and assign permissions for each trainer and client.
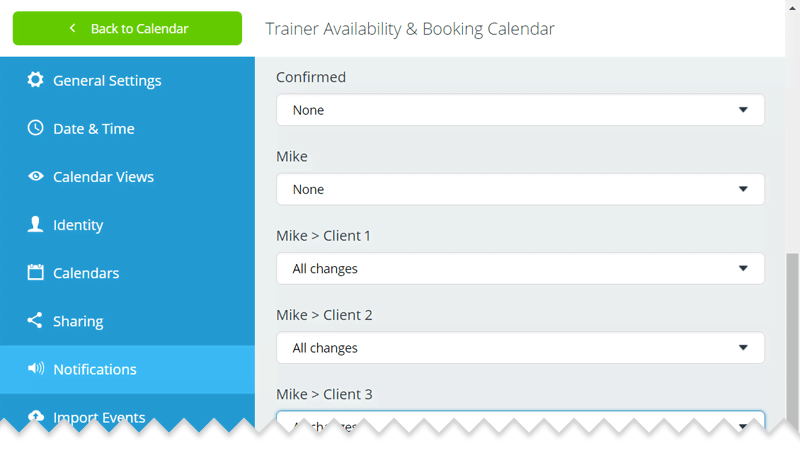
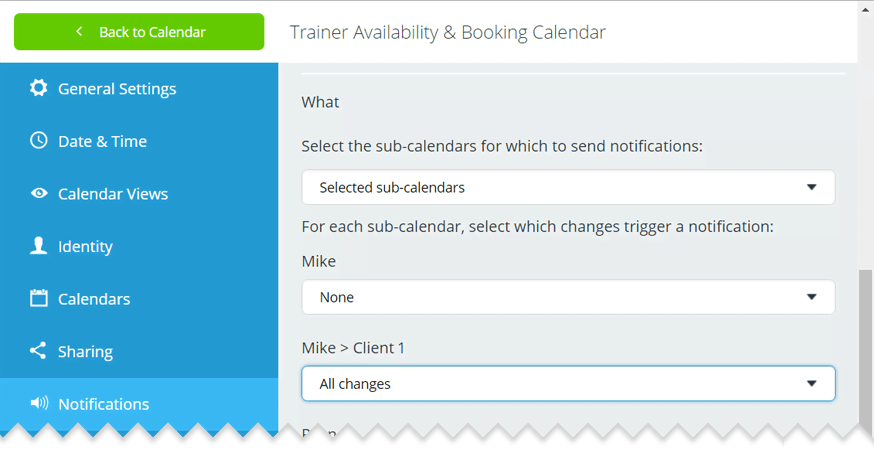
4. Setting up subscriptions to change notifications
One of the key requirements in automating the booking process is to notify a trainer when a booking request is submitted and for the client to be notified when a booking is confirmed. Teamup supports email notifications when changes occur on a calendar. The notification subscription can be set up by the administrator in Settings > Notifications (recommended) or by the end user as described here.
5. How users access their own calendar
Each trainer and client may access their own calendar using the user-specific calendar link provided by the calendar administrator.
[metaslider id=1329]
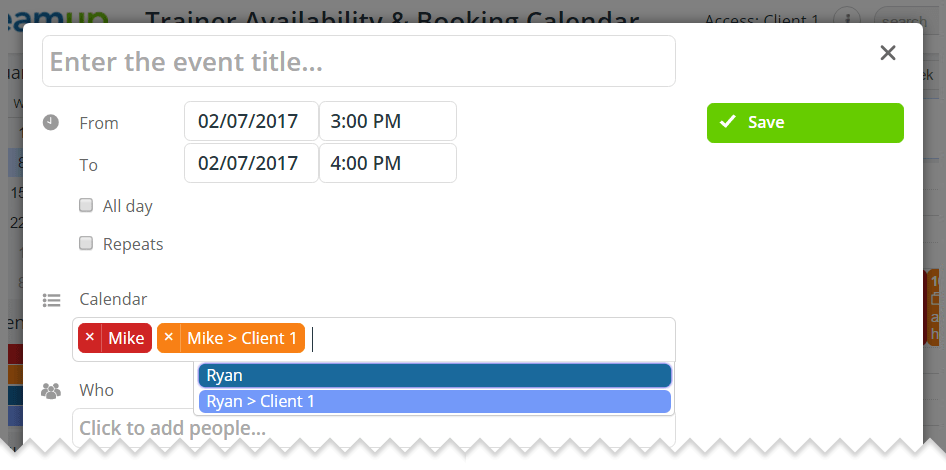
6. Users submit booking requests
In order for the notifications work properly and reliably, it is important that any booking request is assigned to both the trainer’s calendar and the client calendar nested under the trainer’s availability calendar. Learn more about assigning one event to multiple calendars.
Being more efficient and creating better experience with Teamup Calendar
- Administrator: Continue to go through the other tabs in Settings and adjust accordingly to best suit your needs.
- Users (trainers and clients): Learn more tips such as drag-and-drop events to move and ctrl-drag-and-drop to copy, right-click to access the context menu, creating recurring events, shortcut for calendar selection, and export events to other calendars, etc.
 Next Step
Ready to try your own Availability and Booking Calendar? Launch a live demo and test drive for yourself!